Kodi is a powerhouse for entertainment, letting you stream movies, TV shows, music, and more. But with all that customization and tweaking, things can go south sometimes.
Table of Contents
Maybe a new addon causes conflicts, or you just want a fresh start. That’s where the Backup addon comes in! It’s like a safety net for your precious Kodi configuration.
This guide will walk you through creating a backup on Kodi, step-by-step, so you can relax knowing your setup is safe and sound.
Pro Tip: Using a VPN with Kodi is highly recommended. It keeps your streaming private and gives you access to all addons, especially those sweet, sweet torrents! 😉
How to Create a Backup on Kodi:
-
Fire Up Kodi: Let’s get this show on the road!
-
Click the gear icon
-
Add-on Adventures: Select “Add-ons,” then choose “Plugins” (it’s the one with the box icon).
-
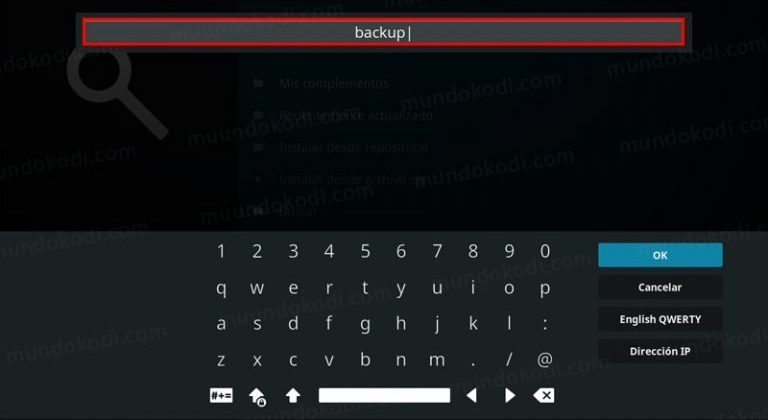
Search Party: Type “backup” into the search bar.

-
Install Time: Find “Script – Backup” in the results and click “Install.” You’ll get a “Plugin Activated” notification when it’s ready.


-
Open Backup Settings: Head back to the Add-ons menu, then click “Add-ons for programs” > “Backup.”

-
Tweak Those Settings: Open “Settings” and go to the “General” tab. Here’s what to do:
-
Type of Remote Route: Choose “Explore Route.” We’ll get to the other options later.
-
Explore Remote Route: Pick a location to save your backup file (a USB drive is a great idea).
-
Compress Archives: Enable this to create a smaller, zip-style file (you’ll need to unzip it when restoring).
-
Backups to Keep: Choose how many backups you want to save (2 or 3 is usually a good starting point).
-
Progress Display: Pick how you want to see the backup progress—we like the “Background progress bar.”
-
-
Choose Your Files: Go to the “File Selection” tab and select everything you want to include in the backup.
-
Schedule Your Backups (Optional): Head to the “Programming” tab to set up automatic backups. Enable it and choose how often you want them to run (once or twice a week is a good idea).
-
Backup Time: Go back to the main Backup addon screen, select it, and click “Backup.”
-
Sit Back and Relax: The backup will start, and the time it takes depends on how much data you’ve chosen. It usually doesn’t take too long!
You’re all backed up! 🙌 Now you can make changes, install new addons, and experiment with Kodi settings without stressing about losing your perfect setup.
Why Backups Are Your Kodi BFF
-
Peace of Mind: Say goodbye to starting from scratch if things go wrong.
-
Experimentation without Fear: Try new addons and settings without worrying about breaking things.
-
Easy Transfers: Moving to a new device? Just restore your backup!
Remember, backups are like having a “get out of jail free” card for your Kodi setup. 😉 Do them regularly, and you’ll be glad you did!


