Netflix has changed its rules about account sharing, meaning you might need to set up your own account. But don’t worry, you don’t have to lose your watchlist and personalized settings! Netflix has a handy feature called Profile Transfer. This guide will walk you through the process.
Table of Contents
Moving Your Netflix Profile: A Guide to Transferring Your Watchlist and Settings
Here’s What You Need to Know:
-
Account Sharing is Out: Netflix now requires each user to have their own account.
-
Transferring Your Profile: You can move your watchlist, recommendations, and settings to a new account using Profile Transfer.
-
New to Netflix? Even if you’ve never had a Netflix account before, you can use Profile Transfer to move a curated profile to your new account.
Before You Start:
The process is easy, but here are a few things to keep in mind:
-
You’ll need the original account: To transfer your profile, you’ll need access to the account it’s currently on.
-
You’ll need to create a new account: You’ll need to create a new Netflix account to transfer your profile to.
Ready to Transfer?
We’ll cover the specific steps in the next section.
What Kind of Information Will Be Submitted?
What will be exported from your Netflix profile is listed below:
- Profile name and icon
- Netflix Recommendations List
- Watch History
- Ratings
- Duration
- Device Information
- Country
- Continue Watching List
- My list Titles
- Game Saves and Game handles
- Settings for language, subtitles, dubbing, autoplay, maturity ratings, viewing restrictions
- Test participation, stream quality, in-app notifications
What Profiles Can Be Transferred
For you to be able to export or transfer your Netflix profile, it is necessary for your profile to fulfil the conditions outlined below.
- Active Netflix account
- Not a Kid’s profile
- Not protected by a PIN
- No profile email address is attached to it.
Transferring Your Netflix Profile: A Step-by-Step Guide
Netflix has changed its policy on account sharing, but you can still keep your watchlist and personalized settings! Here’s how to transfer your profile to a new account:
1. Enable Profile Transfers on Your Original Account
-
Log in: Go to Netflix on your computer or in the app and sign in to the account with the profile you want to transfer.
-
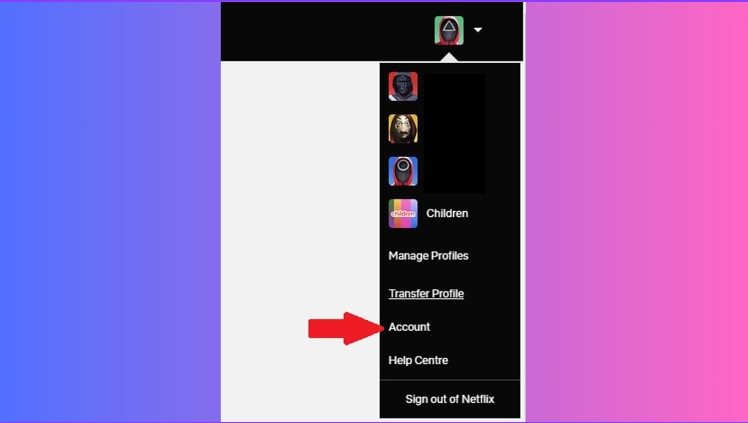
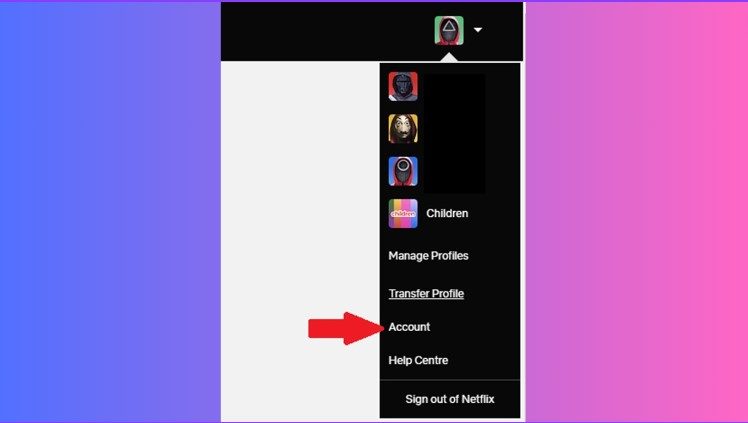
Go to Account Settings: Click on your profile picture in the top right corner and select “Account”.
-
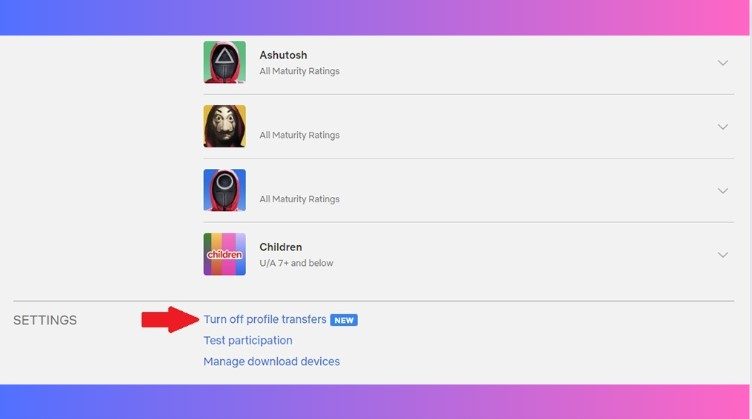
Turn on Profile Transfers: Under “Settings”, enable “Turn On Profile Transfers”.
-
Confirm in your Email: Netflix will send you an email to confirm the transfer. Click the “Enable Instantly” option in the email.
2. Create a New Netflix Account (or Use an Existing One)
-
Log In: Go to Netflix on your computer or in the app and sign in to the account with the profile you want to transfer.
-
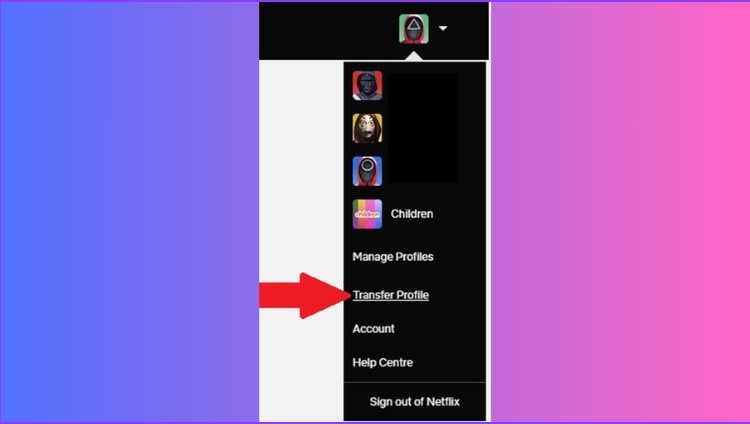
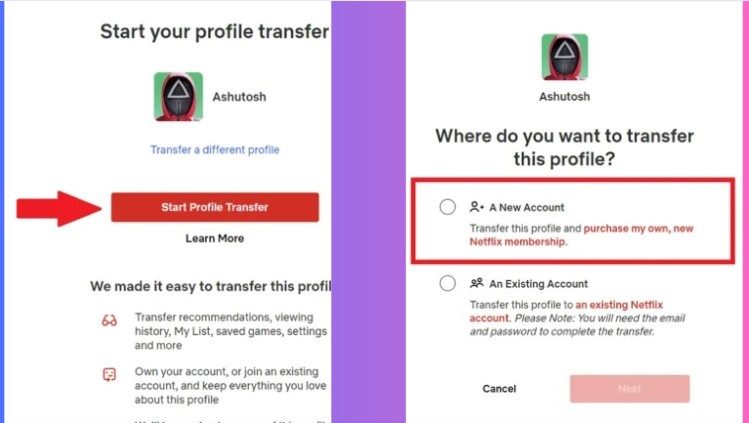
Transfer Profile: Click on your profile picture in the top right corner and select “Transfer Profile”.
-
Start Transfer: Click “Start Profile Transfer”.
-
Choose New Account: Select “New Account” and click “Next”.
3. Enter Your New Account Information
-
Create Account: Create your new Netflix account using your email address and password.
You’re done! You’ll be logged into your new Netflix account with your transferred profile.
Transferring to an Existing Account
You can also transfer your profile to an existing Netflix account. Here’s how:
-
Log in: Go to Netflix on your computer or in the app and sign in to the account with the profile you want to transfer.
-
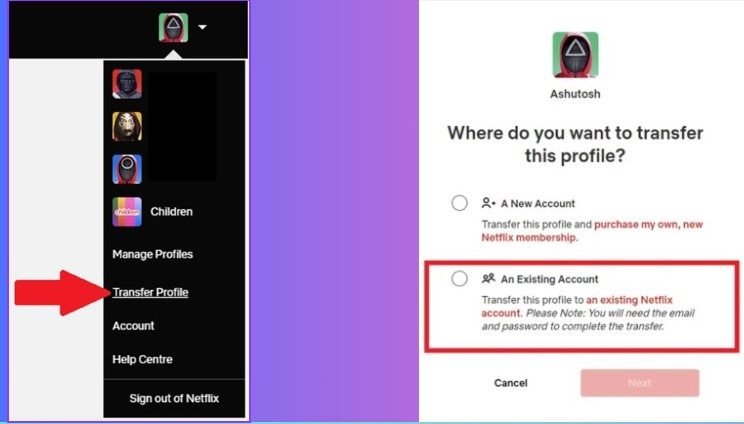
Transfer Profile: Click on your profile picture in the top right corner and select “Transfer Profile”.
-
Start Transfer: Click “Start Profile Transfer”.
-
Choose Existing Account: Select “An Existing Account” and click “Next”.
-
Enter Your Existing Account Information: Enter the email address and password for the existing account where you want to transfer your profile.
-
Confirm Transfer: Click “Transfer Profile” to complete the transfer.
You’ll be logged into the existing account with your transferred profile.
Important Information:
-
No Duplicates: You can’t have multiple versions of your profile within the same account.
-
Third-Party Billing: Profile transfers don’t work with third-party billing. You’ll need to switch to a different payment method or create a new account.
-
Free Service: Profile transfers are free!
Let us know if you have any questions!