How to Easily Sync Your Photos and Videos Folders from Your PC to Your Computer
Backing up your mobile photos to the cloud has been easy for many years. There are many platforms to do this, but Google Photos is the most popular. It works on Android, iOS, and other systems, is simple to use, and fits well with other Google apps.
Table of Contents
Now, Google Photos has added a new feature: you can easily sync your photos from your PC to the web version. Here’s a quick guide on how to sync your photo and video folders from your PC to Google Photos Web.
Until now, the web version of Google Photos did not let computers automatically sync folders. This feature has been available on Android and iOS, where users can select folders to backup to the cloud. PC users couldn’t do this until now, but now we can.
Now, the Google Photos website allows automatic syncing for photos and videos on computers. You can choose which folders on your PC to sync, and Google Photos will back them up every time you visit the website.
The best part? You don’t need to install anything on your computer; everything works through your web browser, and you can access your photos and videos on any device with Google Photos.
The only downside? Right now, this feature is only available for Google Chrome and Chromebooks, but it will likely be available for other browsers soon. We will explain how this syncing works step by step in the next section.
How to sync your PC folders to Google Photos web to back up your photos and videos
Using Google Photos’ automatic web sync is very easy. Just follow these steps:
1. Open Google Chrome on your computer.
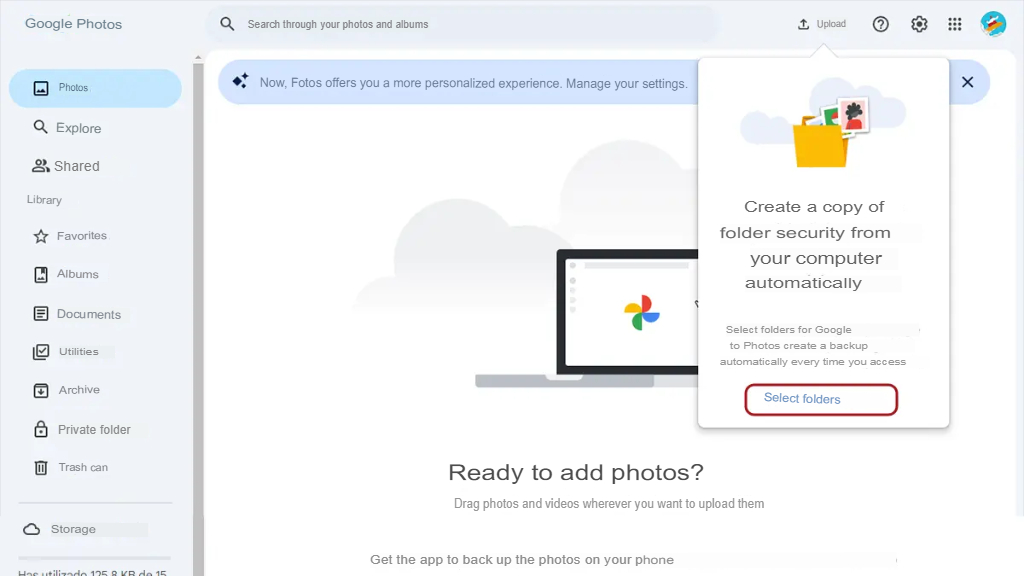
2. Go to the Google Photos website and sign in if you need to.
3. Click “Select folders” in the pop-up that talks about photo backups.
4. If you don’t see it, you can also find it by clicking the “Upload” button.
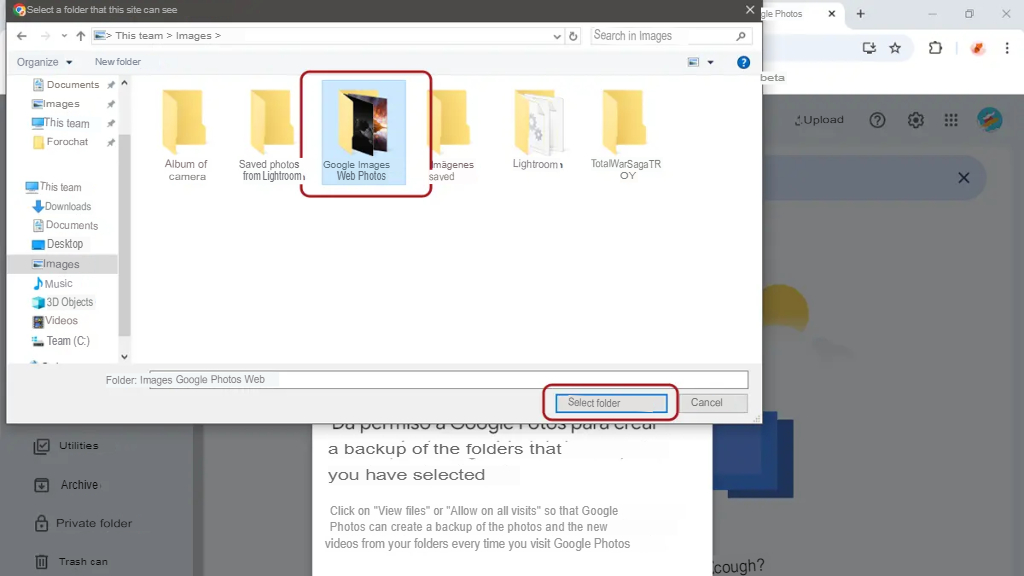
5. Choose the folders on your computer that you want to sync and click “Select folders.”
6. Allow Google Photos to access your files.
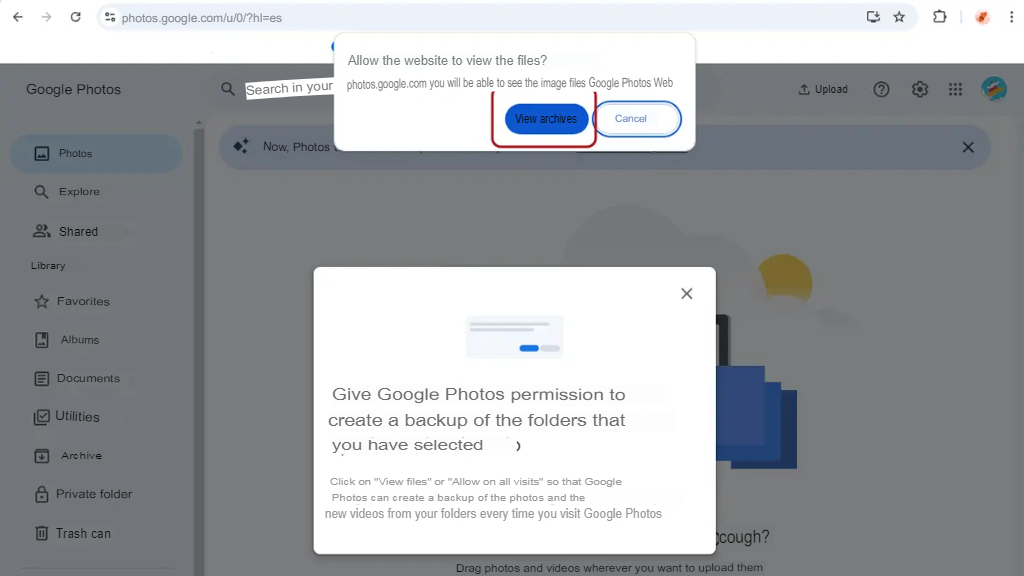
7. Choose the upload quality for your images and videos:
– Original quality: Use this if you have enough storage, especially if you have a Google One subscription.
– Storage saving: This is best if you have a free account or limited space. The images will be a bit lower quality, but the difference is hardly noticeable and it saves a lot of space.
8. Click continue to start the backup.

Once the backup is done, close the window and you’re finished.
From now on, whenever you open Google Photos Web, the folder you chose will sync automatically. You can add or remove more folders for backup by using the “Upload” button.


