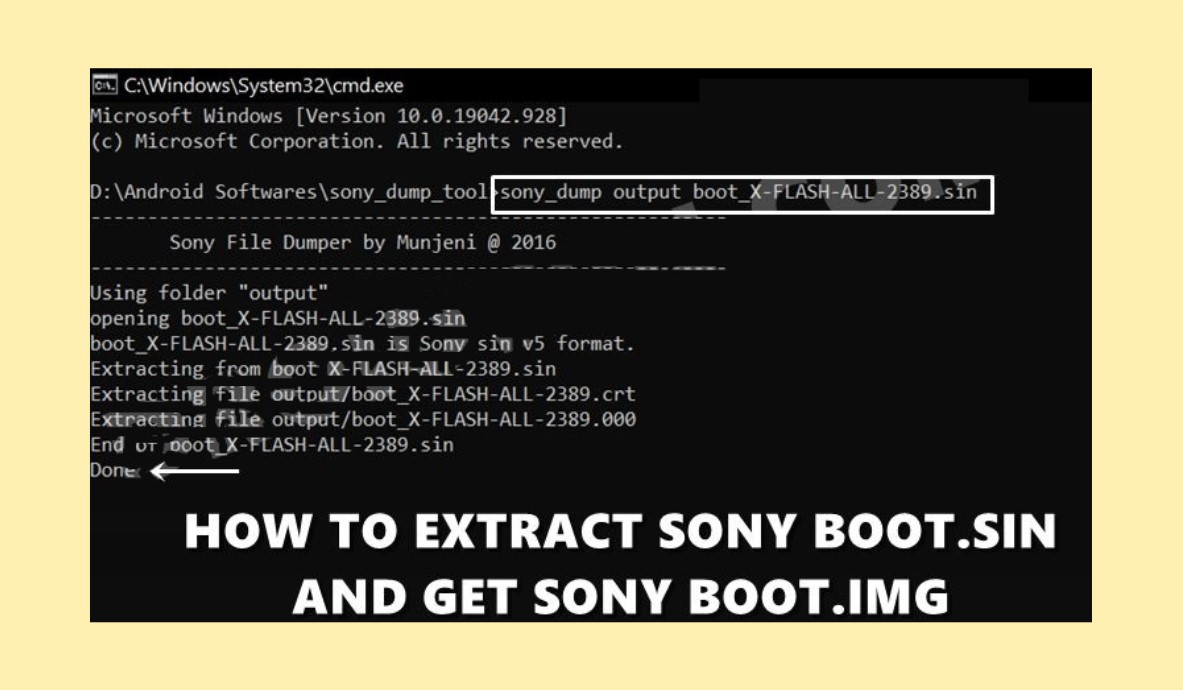
This guide will explain how to extract the Sony boot.sin file to get the boot.img file. To fully unlock your device’s capabilities, you’ll need access to the system partition and admin rights, which you can achieve by rooting your device using Magisk.
There are two ways you can root your Sony device:
- Using TWRP Recovery to flash the Magisk app.
- Without using TWRP Recovery. This method requires you to get the stock boot.img file, patch it with Magisk, and then flash it with Fastboot commands. While this second method takes a bit more time, many people prefer it because not all Sony devices support TWRP Recovery. It also simplifies some of the complicated steps in using a custom recovery.
Unlike some other phone brands that provide firmware files in ZIP format (like OnePlus with payload.bin or Realme and Oppo with OZIP), Sony uses SIN format for its firmware files, including the boot, system, vendor, and other partitions.
If you’re unsure how to extract files in SIN format, this guide will walk you through the steps to get the boot.img from the boot.sin file.
How to Extract Sony Boot.sin and get the Stock Boot.img File

The instructions below are separated into individual sections for clarity and ease of understanding. Please follow them in the exact order listed. Neither AMS nor its members can be held responsible if the steps result in any adverse outcomes, such as thermonuclear war, an alarm not functioning, or any damage to your device or its data.
Step 1: Download Sony Stock Firmware
-
-
Download XperiFirm Tool v 5.6.1 (Credit: XDA Senior Member IgorEisberg).
-
Extract the downloaded file to a location on your PC.
-
Launch the XperiFirm-x64.exe file (or x86 file for 32-bit systems).
-

Locate and Launch XperiFirm:
-
-
Open the extracted folder.
-
Double-click the “XperiFirm-x64.exe” file if you have a 64-bit system or the “x86” file if you have a 32-bit system.
-
Select Device and Firmware:
-
-
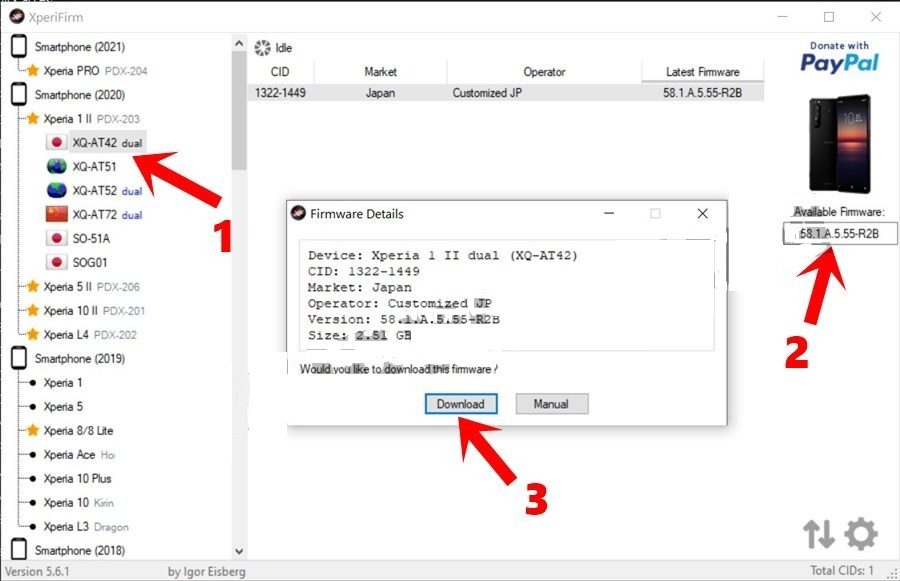
In the XperiFirm Tool, use the menu bar on the left to select your Sony device and region.
-
Locate the “Available Firmware” section.
-
Click on the version number corresponding to the firmware you want to download.
-
Download Firmware:
-
-
Click the “Download” button in the XperiFirm tool.
-
Choose your desired download folder.
-
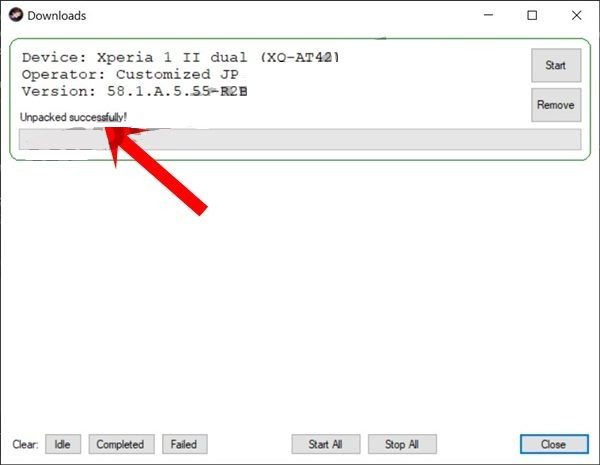
Wait for the download process to finish.
-
Once complete, you’ll see an “Unpacked Successfully” message.
-
Extract Firmware:
-
-
After the download is complete, extract the firmware file to a location on your PC. You can choose any folder you prefer.
-
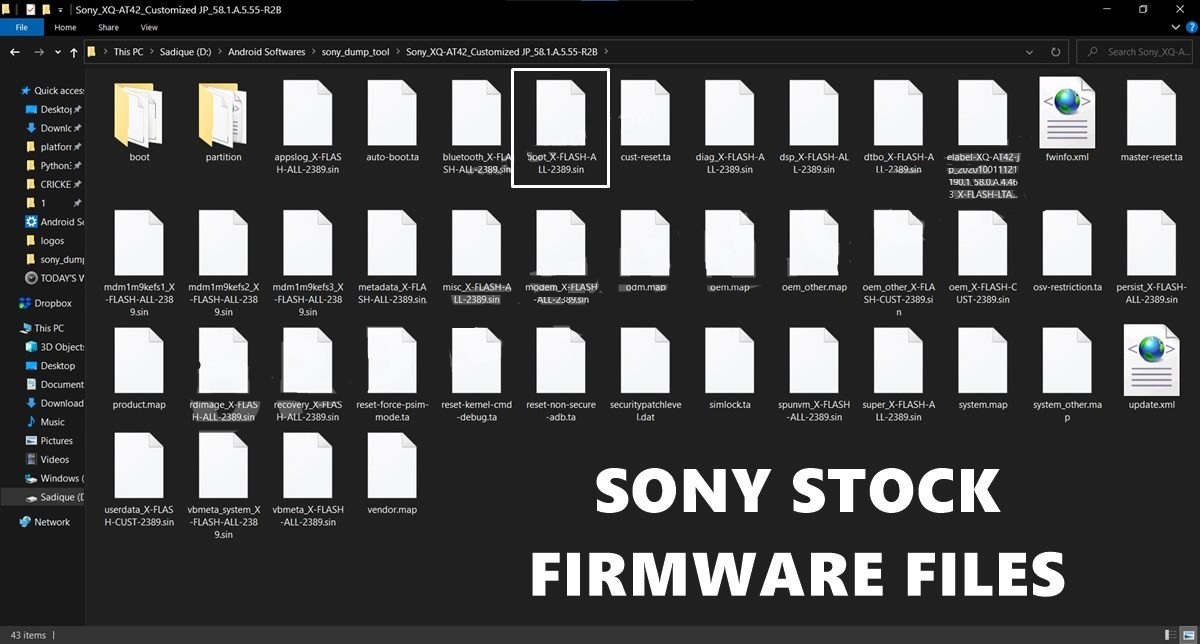
We’ve successfully downloaded the firmware for your device. Next, we’ll extract the Sony boot.sin file to obtain the stock boot.img file.
Step 2: Extract the Sony Boot.sin file and get Boot.img
Download Sony Dump Tool:
-
-
Download the Sony Dump Tool (Credit: XDA Senior Member munjeni).
-
Extract the downloaded file to a location on your PC.
-
Move boot.sin File:
-
-
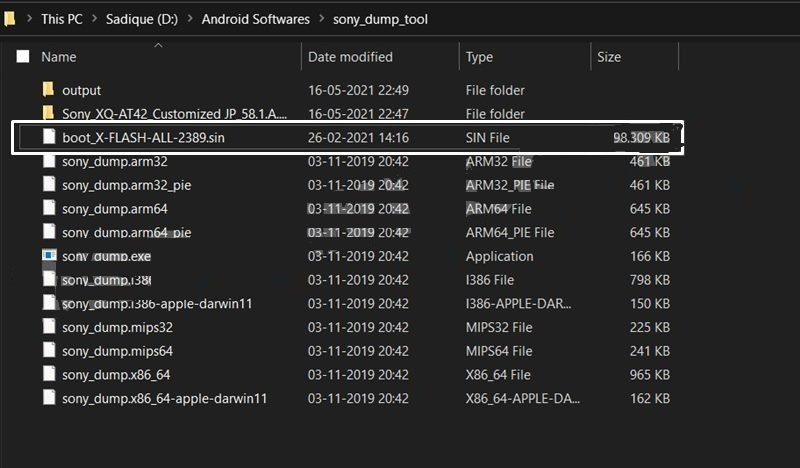
Locate the boot.sin file you downloaded in Step 1.
-
Move this file to the same folder where you extracted the Sony Dump Tool. This will simplify the following steps.
-
Create Output Folder:
-
-
Inside the folder containing the Sony Dump Tool, create a new subfolder named “output”. This is where the extracted boot file will be saved.
-
4. Launch Command Prompt:
-
-
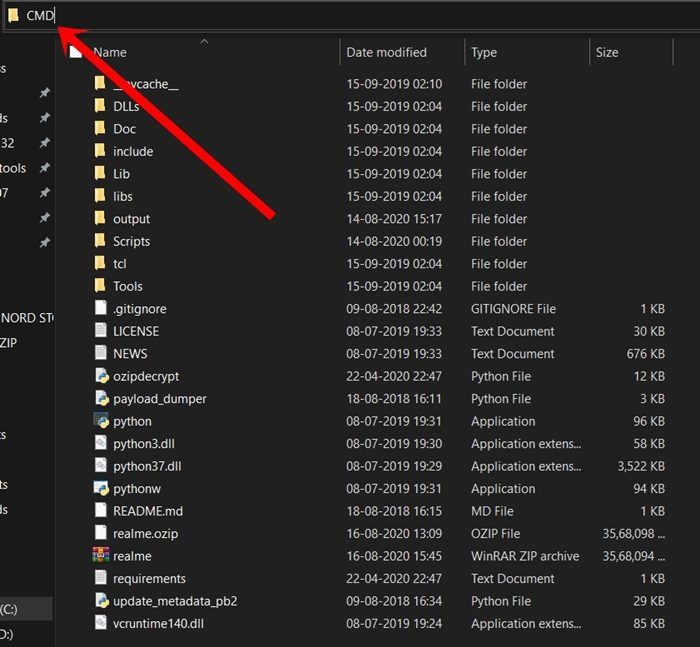
Navigate to the address bar of the Dump Tool folder.
-
Type “CMD” and press Enter. This will open the Command Prompt in the correct directory.
-
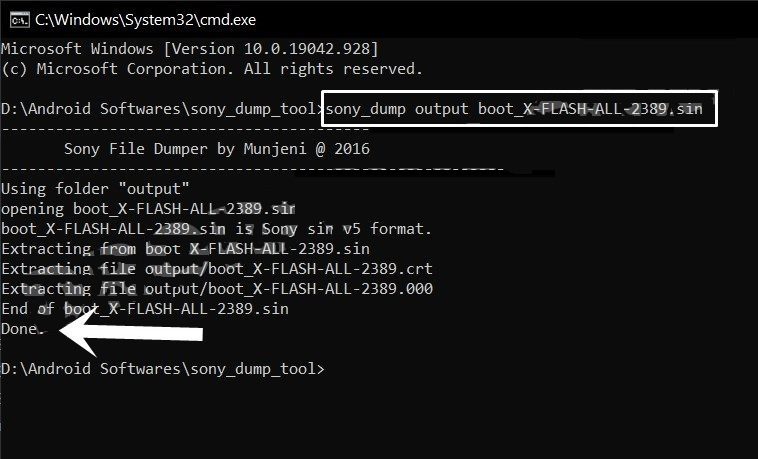
- In this CMD window, execute the following command (replace boot filename accordingly):
sony-dump output bootfilename.sin
- The boot filename in my case is boot_X-FLASH-ALL-2389, so the command is:
sony-dump output boot_X-FLASH-ALL-2389.sin
Create Output Folder:
-
Inside the folder containing the Sony Dump Tool, create a new subfolder named “output”. This is where the extracted boot file will be saved.
Launch Command Prompt:
-
Method 1 (Address Bar):
-
-
Navigate to the address bar of the Dump Tool folder.
-
Type “CMD” and press Enter. This will open the Command Prompt in that location.
-
-
-
Method 2 (Right-Click):
-
-
Right-click anywhere inside the Dump Tool folder.
-
Select “Open command window here” (or a similar option depending on your operating system). This will launch the Command Prompt in the correct folder.
-
-
Rename boot.img File:
-
-
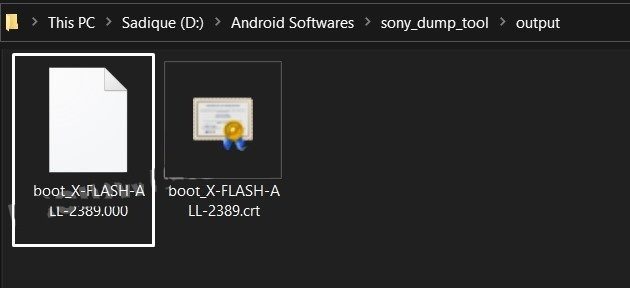
Locate the extracted boot.img file: It should be located in the “output” folder you created earlier.
-
Right-click on the file: Choose the “Rename” option.
-
Append “.img” to the filename: For example, if the file was originally named “boot.sin”, change it to “boot.img”.
-
Confirm the change: A popup message will appear asking if you’re sure you want to change the file extension. Click “Yes” to confirm.
-

You’re very welcome! It sounds like you’ve successfully completed the entire process and are now ready to use the extracted boot.img file.
If you have any more questions about this process or other Android-related topics, don’t hesitate to ask. I’m always happy to help!