Oppo F9 – F9 Pro Secure Boot DA File [Format Single Partition]
Format A Single Partition In Oppo F9 – F9 Pro using Oppo F9 – F9 Pro Secure Boot DA File. This is a step by step guide showing how to format a single partition of an Oppo F9 – F9 Pro using SP flash tool.

Why would I want to format a single partition on my Oppo F9 – F9 Pro?
There are different causes why one might want to format a single partition on an Oppo F9 – F9 Pro. One such example is when your device is FRP locked, all you need do is to format only FRP partition OR maybe you need to perform a factory reset but you are unable to boot into recovery mode for some weird unknown reasons, all you need is to format user data and cache partitions. The method below will show how we can do this.
Requirements to format one single partition on my Oppo F9 – F9 Pro:
- Supported Phone: Oppo F9 – F9 Pro
- Charge your mobile: You may no less than a half charge.
- Laptop or PC.
Take Oppo F9 – F9 Pro Backup:
- First Create a copy of your Call Log – Contacts – Sms – Etc With G Backup
- Second Make a duplicate of current Oppo F9 – F9 Pro Firmware With MTK Droid Tool
- Third backup Oppo F9 – F9 Pro IMEI NVRAM
Download Oppo F9 – F9 Pro Flashing Tool And Drivers:
- Oppo F9 – F9 Pro Flash Tool: Download the latest SP Flash tool and extract it (Install)
- Oppo F9 – F9 Pro USB driver: Get VCOM Driver and set up on your pc (still works with MT67xx phones)
- Windows 10/Pro users: READ: How To Install MTK USB Vcom Driver On Windows 10 (32 & 64 bits)
Oppo F9 – F9 Pro Secure Boot DA File Detail:
- File Name: S4 IX626B Boot DA
- Device Supported: Oppo F9 – F9 Pro
- Tool Supported: Sp Flash Tool
Download
Oppo F9 – F9 Pro Da Boot Auth File.rar
How to Format a Single Partition of Oppo F9 – F9 Pro:
1. The steps below explain how to format a single partition of an Oppo F9 – F9 Pro using SP flash tool.
2. Extract the content of the SP flash tool zip file and Launch SP flash tool.

3. Select the scatter file for your device by clicking choose besides the scatter-loading file’s dropdown bar.

4. In the windows that appear next, navigate to and select the Oppo F9 – F9 Pro scatter file.

5. You should now be taken back to the SP flash tool window, click on the Format tab.
![Oppo F9 - F9 Pro Secure Boot DA File [Format Single Partition]](https://aiomobilestuff.com/wp-content/uploads/2019/04/Huawei-MYA-L03-Secure-Boot-DA-File-Format-Single-Partition-1.jpg "Oppo F9 - F9 Pro Secure Boot DA File [Format Single Partition]")
6. Tick the checkbox beside “Manual format flash”

7. Open windows explorer and navigate to the location of the scatter file you selected earlier on then open it using Notepad++
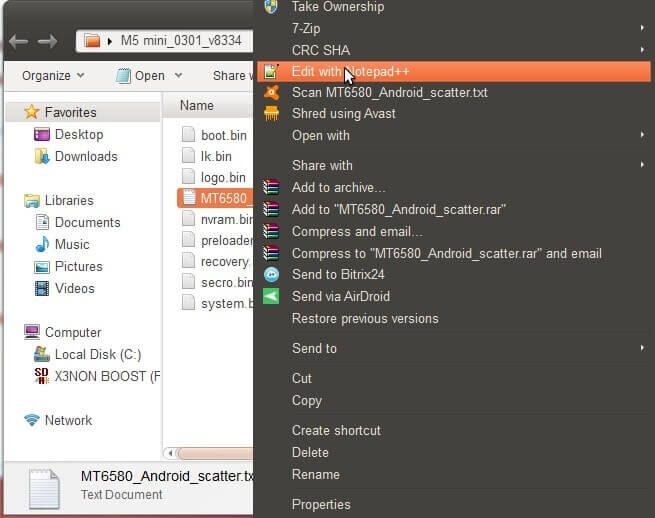
8. Scroll down the contents of the scatter file till you get to the partition you wish to format [in my case, I’m trying to format FRP partition]

9. Input the values of Linear_start addr and partition_size into SP flash tool then Click on Start
Code:Linear_start addr = Begin Address
partition_size = Format Length


11. Now you can boot up the Oppo F9 – F9 Pro.
Disclaimer:
- Once SP flash tool has detected your device, avoid disconnecting till the task is complete as this might cause the Oppo F9 – F9 Pro to go dead.
- If you accidentally selected “Autoformat – Format all”, your device will go dead and you’ll need to flash full Oppo F9 – F9 Pro stock ROM to revive the phone.
- Avoid using a random Oppo F9 – F9 Pro scatter file (even though its for your chipset) in Sp flash tool. Just because a scatter file is for your chipset doesn’t mean it contains the same partition info. Formatting with a wrong scatter file could result in more problems than you initially intended to fix.
- SP flash tool was created by MediaTek Inc. so credits to them for the tool.